Category: tutorials

  • High Key Wedding Bouquet Portrait

    High Key Wedding Bouquet Portrait

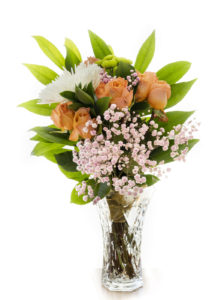
    The wedding bouquet is a beautiful yet utilitarian part of the wedding entourage. It is a useful prop that gets abused more than it probably should. The bouquet gets handed off innumerable times during a wedding and finally gets thrown into a crowd for one of the bridesmaids to try and snag.

    Portrait Set-up

    Despite all that abuse, I think the wedding bouquet is one of the most beautiful aspects of the wedding day. To properly capture its glory, I came up with the idea of taking a high key portrait of it to preserve its beauty before it gets tossed around too much. A high key portrait means that the light is set to overexpose the scene. The idea is to get the background to blow out or clip. For best results, a white background should be chosen for this type of portraiture. In human portraiture, a white scrim or backdrop cloth can be used but on location at a wedding, a white linen tablecloth or other translucent white fabric will work perfectly. The sun or other bright light light source like a flash or strobe should be set behind the bouquet to back light the flowers. Take a series of exposures starting at an even exposure and then progressively increase the exposure until the detail in the flowers start to white out or blow out. The last step is assembling the final product in Photoshop. Some layer blending is required to balance background and the detail in the flowers. The final product should look something like this:

    high key, wedding bouquet, wedding photography, broomfield, colorado
    High key wedding portrait of wedding bouquet

    Since we are under a stay-at-home order due to COVID-19, I had to improvise my set up a little for this shot. I made my own wedding bouquet from flowers I purchased at the grocery store and a ribbon we had lying around the house (don’t make fun of my lack of floral arranging skills too much). I used a white sheet as my backdrop, and I posed the bouquet on a table in from of my glass screen door. The sun is a great diffuse light source as it comes in through the sheet.

  • Outdoor Portrait Lighting

    Outdoor Portrait Lighting

    There are a variety of lighting techniques a photographer can use for lighting an outdoor portrait, ranging from using existing light (incident) without any artificial light enhancement to studio strobes equipped with light modifiers. This article discusses a few of those techniques and tries to show the differences between using each of them. Knowing what lighting technique the photographer will be using is critically important for the customer as well in trying to decide between photographers. Different customers have different “looks” they are after and knowing what technique produces each look will assist the customer in making the correct decision on a photographer. FYI, if you are a customer desiring a well-balanced, evenly lit portrait, don’t hire a photographer who shows up to the job holding just a camera. They won’t get the desired effect you’re after. Photographers who are comfortable using all of the above techniques, rather than just specializing in one, can broaden their appeal to customers as well.

    Incident Light

    The first technique I want to discuss is using available light or incident light to create a portrait. This is the easiest technique to use for the photographer because little or no extra equipment (besides the camera) is often needed. It is perhaps the most difficult, however, to achieve the desired end result–a well-exposed portrait. Some very experienced environmental portraiture photographers can achieve beautiful results using a combination of reflectors and diffusers, but this increases the amount of equipment (and assistants) needed to take the photo.

    The biggest hurdle that has to be overcome with this technique is the huge contrast range between the background and the person’s face. As can be seen from the two photos below, this means that either the background is properly exposed and the person’s face is in shadow, or the reverse is true.

    Incident light portrait exposing for subject’s face
    Incident light portrait exposing for background
    Incident light exposed for subject’s face

    As you can see, the contrast is too much for the camera to handle. Either the background or the person’s face looks properly exposed. This can be handled in one of three ways–exposing for the background and adding light with a reflector to fill in the shadow, exposing for the background and adding artificial light with a flash, or waiting for a cloudy day to cut down the contrast (problematic in a place like sunny Colorado). I’ll discuss a couple of ways how to use flash to fix this. I’m not the biggest fan of reflectors since it requires an assistant to hold one (wind often blows the reflector out of position if just a stand is used to hold it), and their use often causes the subject to squint as you shine light back into their face. When done properly, however, the effect can be stunning as nice warm light is reflected onto the person’s face to fill in the shadows.

    On-Camera Flash

    The smallest and simplest way to fix the lighting conundrum above is to use a flash positioned atop the camera (these flashes which fit onto the hot shoe are known as speedlites). The idea is to add a small pop of light onto the subject’s face to balance out the portrait. While on-camera flash gets the job done, the results can be rather crude. As you can see from the examples below, the lighting is flat since the flash is fired directly at the subject.

    Exposing for background using on camera flash
    Exposing for the background using an on-camera flash

    Off-camera Flash

    If you want to add dimensionality to the person’s face, the flash has to be taken off camera and positioned more to the side. Think of a Rembrandt portrait, for instance. The light does not fall directly on the subject but comes from the side to give the face a more distinctive look. There are a number of ways to achieve this side lighting effect. The first involves simply turning the flash that is sitting atop the camera to the side and bouncing it off a white reflector. Again, I’m not crazy about reflectors outdoors, so the better solution IMHO is removing the flash from the camera altogether and placing it atop a light stand. You can use the same speedlite or a more powerful battery-powered strobe for this purpose. And while strobes are a lot heavier and bulkier, they have far more power to allow for the use of bigger light modifiers which can produce striking results.

    Bare bulb flash

    The first way to do this is position a flash to the side of the subject without use of any light modifiers. This adds dinesionality but the look is a little harsh.

    Off-camera flash without modifier
    Off-camera flash without modifier

    Off-Camera flash with modifier

    A far better way to use off-camera flash is to attach some sort of modifier to the flash to soften the light. Think of holding a white sheet over your head on a sunny day. The light becomes much softer. For outdoor use, I prefer either a shoot through umbrella (a translucent umbrella that is placed in front of the flash) or a beauty dish or octagonal softbox. Now as you can see below, the light quality softens but the light directionality is still maintained.

    Off-camera strobe with shoot-through umbrella
    Off-camera strobe using shoot through umbrella
    Off-camera strobe with beauty dish

    So the next time you take a portrait outdoors, try one of the above techniques to improve your photography. Or better yet, the next time you hire a photographer for an outdoor portrait, you’ll know what questions to ask the photographer about what equipment he or she will be using so you can be more confident in getting the results you want.

  • Converting Photos to Black and White

    For more than 100 years, black and white photography developed as an art form where the quality of the final print was directly related to skill in the darkroom. The artist either had to be proficient in developing and printing negatives or effectively communicating his vision to the local commercial printer (often with mixed results). Ansel Adams devoted entire books to the developing and printing of black and white negatives with this in mind.

    But if you’re like me, working in a darkroom has little allure. I’m not a vampire; I don’t like dark, cramped spaces. But with the advent of Photoshop, the conversion of color photographs became a realistic option for creating black and white prints. Early on, this required scanning color slides or negatives and then converting the digital file to black and white. This method had its limitations, however, as scanned files would deteriorate if pressed too far in one direction or the other (banding in the sky being the biggest issue).

    Enter the digital camera. Direct digital captures have more dynamic range than film does so more detail can be drawn out of shadow and highlight areas. More importantly, you don’t have to worry about the scanning process degrading the sharpness of the image or adding other artifacts. Today’s digital captures offer the artist an almost unlimited avenue for creative expression in the black and white medium. The final image can be made to mimic old-style darkroom prints (including sepia tones) or look like something entirely new and inventive.

    I like high contrast black and white photographs. I love the way black and white photography can emphasize the line or shape of the subject. In particular, I like to convert images of the Southwestern U.S. and waterfalls to black and white. But almost any subject matter can be successfully converted. When converting to black and white, the first thing I look for is an image that either has high contrast built in or has lines or forms that are interesting to look at. I try to visualize how the image will look once it is converted.

    Wahkeena CVreek, Columbia River Gorge, waterfall
    Wahkeena Creek, Columbia River Gorge, OR

    black and white, photography, landscape, escalante national monument
    A rock swirl in the Escalante National Monument

    Step by Step Process of Conversion

    There are four basic methods of converting a color file to black and white: 1) using the Black and White image adjustment function in Photoshop; 2) using the Channel Mixer to adjust the separate color channels and converting to gray scale; 3) desaturating the file using the saturation slider; or 4) using a black and white preset in Lightroom or other editing program. I find the first option (Black and White adjustment tab) gives the user the most control over the resulting image, so I prefer to use it over the other three methods. Both primary and complementary color channels can be adjusted under this tab as compared to the channel mixer which does only the three primary colors. This comes in handy when I want to adjust highlights in water or rock or darken certain areas of the sky. The use of Lightroom’s black and white presets can provide some nice results but the user has no control over how the image looks other than selecting a given preset. Desaturation is the least preferable of the methods because the user has no control over how the individual colors are desaturated to make the final grayscale image.


    Default preset, Black and white tab, Photoshop
    Default preset, Black and white tab, Photoshop

    Photoshop Desaturation Slider
    Photoshop Desaturation Slider

    Photoshop screen shot, Channel Mixer
    Photoshop screen shot, Channel Mixer

    Lightroom infrared preset
    Lightroom infrared preset

    Black and White Photoshop Tab

    The black and white tab offers a number of options that mimic the effects of color filters used in conjunction with black and white film. I will often look at previews of a few of these before selecting the one I want to start with. The nice thing is that each preset is just a starting point—the user can then adjust the percentage of each of the colors to his or her liking from there. For shots containing blue sky, I often start with the infrared preset since it creates a dark sky. I will often then lower the Cyan and Blue colors even more to produce a completely black sky. I also find I often have to lower the yellow slider to prevent highlights from blowing out. Conversely, if I am converting a shot of a waterfall or foliage, I’ll select the green filter preset at the outset or just use the default setting.  I also like the green or default preset for images of people.  From the black and white tab, you can also add a tint and control the hue to add a sepia toned look to the final image.

    Infrared preset

    south coyote buttes, black and white
    South Coyote Buttes

    Green Preset

    Norway, waterfall, black and white
    Norway waterfall

    Default Preset

    bridal portrait, black and white
    bridal portrait


     Adding Elements of Color

    If I’m being really creative, I will mask off a given part of the image, reverse the selection, and convert everything in the image but that one object to black and white.  This works great for images that contain a flower or other element of color I want to keep in the image.  The quickest way I’ve found to do a selection of a color is to use the color range tab under the selection menu.  You can use the eyedropper tool to select the color you want masked.  I’ve found I have to use the magic wand tool to add to the selection once I’ve started it using the color range tool.  This is relatively straightforward when it involves one object but is more time consuming if you are selecting multiple objects.

    iris, black and white
    Iris in black and white with orange beard

    Final Touches

    Once I’ve converted a given file to black and white, I’ll save the converted image under a different name so I don’t overwrite the color image file. I will then determine if the image needs any overall adjustments such as contrast or levels. After making these final adjustments, I’m done. Voila. I have created a black and white image in a matter of minutes that would’ve taken much more time in effort in the old days to create in the darkroom.

Plugin from the creators ofBrindes Personalizados :: More at PlulzWordpress Plugins